
The dictionary defines a bed as: An article of furniture to
sleep or rest on. From the beginning of the age of
enlightenment, man has gone well beyond this simple
definition. The bed has become the most glorious piece of
necessary household furniture in history. There have been so
many elaboration's of the same basic components that it
would make quite a list of designs. Every culture claims at
least one rendition of the "Bed" to be its own. Through the
years, I have had the extreme pleasure of building many
different bed concepts for both lodging establishments, and
individuals around the country. At some point along the way,
I decided to blend some of the best features of several bed
styles into one.
The English "poster bed" features four
tall corners that are either turned, tapered, or in some
cases, kept square. Sometimes in these beds the top is
resolved as a canopy that is held up by the four corners. On
the other hand, the provincial style bed features the use of
curves in the head and foot boards as well as in the
skirting. Both of these disciplines will often times
incorporate the use of draperies that make the sleeping
spaces very private. Where Provincial styled pieces are not
necessarily elegant, they do have style. The English
renditions are courtly by design, and offer a lot to choose
from when looking for features to elaborate upon for a new
design. My "elegant poster bed" borrows a little from both
of these styles, and at the same time has many amenities of
it's own. This bed is quite simple to build, and would be an
admirable addition to any home. I wanted to learn how to
build a bed that still had the Victorian look to it, but was
easy to build by the beginner. I think I have
succeeded in my mission.
The bed that was decided upon for the
purpose of this article was built for a standard queen sized
box spring and mattress, available at any store. The length
and width of the bed are a specific set of dimensions, but
the height, of course is optional. I decided upon 84" high
which works good in just about any room. Keep in mind that
the cutting list, and dimensions given in this article may
change according to the mattress size, and height that are
chosen. This bed was built of nominal size, (already
surfaced), 4/4 Alder which can be purchased by the board
ft., (random width and length), or pre-dimensioned at the
mill. Any specie can be substituted according to shop
capabilities, material availability, or personal taste.
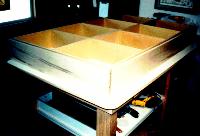
As with any building project we will
start with the foundation. The core of the sleeper base is
built as a rectangular plywood frame with ribs (figure 1). I
rip one plywood or composition 3/4" x 4' x 8' panel into six
strips that are 7 7/8" wide by 8' long. This formula allows
1/8" for each saw kerf which means there will be no remnants
or waste. This cutting procedure will yield enough material
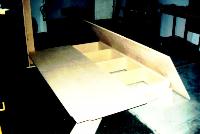
to make a base that is 75 1/4" by 44 1/2". After this has
been built a three sided mitered layer of 3/4" finished
plywood is added onto the butt-jointed base to eliminate any
unsightly plywood edges, or screw heads. The dimensions of
the sleeper base will be 7 7/8" high x 46" wide x 76" long
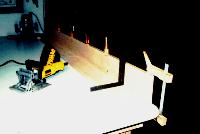
when completed.. This fully assembled base will support the
plywood bottom panels, (two - 3/4" x 30 3/4"W x 87"L), and
leave 8" of overhang on the two long sides, and the front
(figure 2). Incidentally, the two remnants from the full
sheets used for the bottom panels can be cut down for the
outside finished plywood layer of the sleeper base.
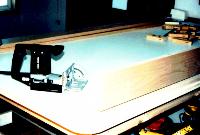
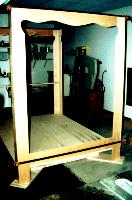
Once the base has been completed,
focus can be turned to the four corner columns. These
columns serve as the structuring from which all else is
suspended. For these parts you should start with some
relatively flat, and straight pieces of 13/16" thick
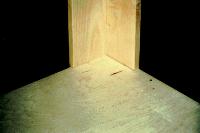
material, (if nominally size hardwood is used). Cut four
pieces that are 5"W. x 83 1/4"L, and four pieces which are 5
13/16"W. x 83 1/4L.". These eight pieces will go together in
a butt-joint fashion (figure 3) to make the four corner
columns which will later be routed with a traditional shape
to minimize the glue seam.
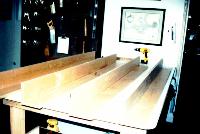
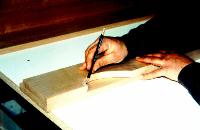
Once the parts have been cut, they
should be laid out in order on the bench, and marked for
biscuit or dowel jointing (figure 4). The upper outside
edges of the columns will have a scrolled detail which
begins 5" down from the top. Because this shape is typical
on both sides of the individual columns, I usually will cut
the detail on one of the smaller parts, (before assembly),
and then use this piece as a template for the seven
remaining parts. This way I am assured that the detail will
be perfectly aligned on all four of the columns (figure 5).
A flat bench, or counter top serves as a good strong back
while gluing. Make sure that you use a framing square on the
inside while clamping (figure 6). To correct any tilting
that may occur, just adjust the individual clamp angle while
tightening that area of the post. If this is done while
working from one end to the other, the entire post will dry
square.
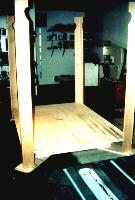
After the columns have been
fabricated, the indent notches can be cut into all four
corners of the plywood platform (figure 7). Note that this
is an area of the plywood which overhangs the sleeper base.
The corner columns start at the floor, and give an
independent support to the bed frame which is separate from
the sleeper base. Attached to the plywood edges with 2"
counter sunk screws, the columns are "tacked" in place while
the rest of the parts are being cut and fit (figure 8). The
screw heads in this area are ultimately covered by either
the bottom plinth blocks, or one of the bottom perimeter
trim pieces. On final installation a hardwood corner block
will be attached to the underside of the notched plywood
where it meets the columns.
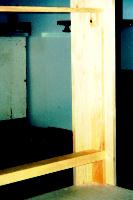
In the next step, the upper skirt
boards are fit to the top of the corner columns. These four
perimeter boards have a many fold purpose. Primarily used to
square, and strengthen the top portion of the bed, they are
also a means of tying the posts together in an aesthetic
way. The skirt boards also serve to support the top canopy
frame. At the widest area of detail the skirt boards are all
6 3/4" wide. The scroll pattern is a little different
according to the two different lengths, but both patterns
begin at 5" wide on the ends. When designing a pattern of
your own, try using the same approach of drawing, and
cutting one quadrant, and using it as your template for the
rest of the parts.
After all four boards have been
scrolled, and edge sanded, (ready for routing), the ends can
be prepared for biscuit, or dowel jointing. At this point,
the two shorter skirts on the ends, or width of the bed, can
be permanently glued to the corner columns. The back of the
bed which will ultimately become the headboard, has the top
skirt board only to be glued into place. This can be done by
simply separating the two columns at the top, (which are
attached to the plywood base), just enough to fit the glued
board, and its biscuits or dowels. The front, or foot of the
bed, will have two "rails" to contend with (figure 9). The
bottom skirt, which is the same length as the top skirt, (50
3/4"), is cut 6 1/2" wide. Because this skirt rests on the
plywood bottom between the two columns, one of the columns
will have to be removed temporarily during the gluing
process. The idea here is that when all is said and done,
these assemblies at each end of the bed will become two
completed sections which can be removed for transporting,
and installation purposes.
With the two ends of the bed glued,
and in place, the top skirt boards can be fitted. These
boards will be approximately 75 1/2" long for this size
mattress, but it is a good idea to measure the distance at
the bottom between the posts just above the plywood, and
then cut the top skirts accordingly. These boards are not
glued into place because they must be removable for
transportation. While the clamps are holding the biscuited,
or doweled boards in place, a diagonal screw is driven in
each corner into the posts. The clamps can then be removed
without fear of the boards coming loose. Now the main
structure of the bed is complete.
At this point we move back to the
headboard end of the bed. Remember, this end has only the
top board glued in place, and is tacked to the plywood at
the bottom. A frame can now be built on the inside of the
columns which not only completes the structure, but is also
used to nail the headboard pieces (figure 11). The height of
this back panel is approximately 35" from the plywood deck.
About 20" of that will be covered by the mattress at the
bottom so it is a matter of opinion whether the finished
panel should continue all the way down to the top of the
plywood. I do run mine all of the way down. For this size
mattress width, you will need twelve pieces 5 1/16" wide to
complete the panel. For this bed I used a V-groove and bead
treatment where the boards come together on the edges. I
also used a simple pre-stained, loose spline system so you
will never see daylight if the boards expand, and contract.
I always lay the boards out on the bench first to achieve
the exact size that I need before they are installed (figure
12). Depending upon your equipment, or taste, you may elect
to use another type of headboard treatment such as a frame,
and beveled panel for your bed. I have made them many
different ways, and they all look good.
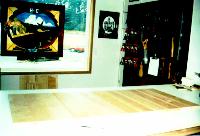
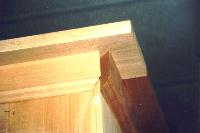
With the headboard complete, it is time
to focus on the top frame and crown skirt. The top frame is
made of four pieces that are 13/16 thick, and 5 3/4" W. This
formula allows for about 2 1/2" of overhang on the sides,
and front, and still leaves room to screw the frame down to
the top skirts and posts. For this size bed, the boards are
cut to 89 5/8"L, and 56"L. A simple butt joint with
biscuits, or dowels is used for this frame. Once the boards
are ready, the frame can be clamped and glued together right
on top of the bed (figure 13). This will save floor space
etc.
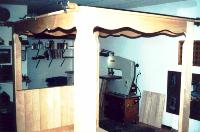
The crown skirt pieces which occurs
under the top frame is applied during the final
installation. This piece will run on the two sides and front
only. These pieces which are 13/16" X 2 1/4" wide should be
edge shaped with a shaper or router. They are then mitered
on the ends where the pieces meet, (figure 14), and kept
square in the back where the bed will go against the wall. I
attach this piece with screws from the back so that it can
be removed if the bed ever has to be relocated. You may
elect to use a different type of crown skirt, again
depending upon your capabilities, and taste. Remember the
piece is a mix of both French provincial, and English so
there is a lot of play in the area of design.
There are two side bottom retainer
boards which also go on during the final installation
(figure 15). I put a heavy bull nose on the edges of all
three retainer boards due to their precarious positioning.
The front retainer board, which is an important part of the
end frame, is already in place.
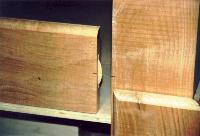
Now all that is left on our bed is the
garnishing. I like the use of boots, or plinths, (also shown
in figure 15), on all four corners of the bed. The headboard
section only requires plinths on each side, but the fronts
should have a two piece mitered plinth which encompasses the
whole corner. These blocks not only cover the screws which
hold the columns to the plywood bottom, but also serve to
protect the column where it meets the floor. All of the
plinths should be screwed on from the back so that they can
be easily removed. There is also a plywood edge on three
sides which has to be covered. For this I use a simple
molding which is 1/2" X 13/16". This piece can be made from
some of the downfall edges of the solid stock. A simple
traditional shape should be routed on both of the edges on
this piece.


